Using decimation master zbrush
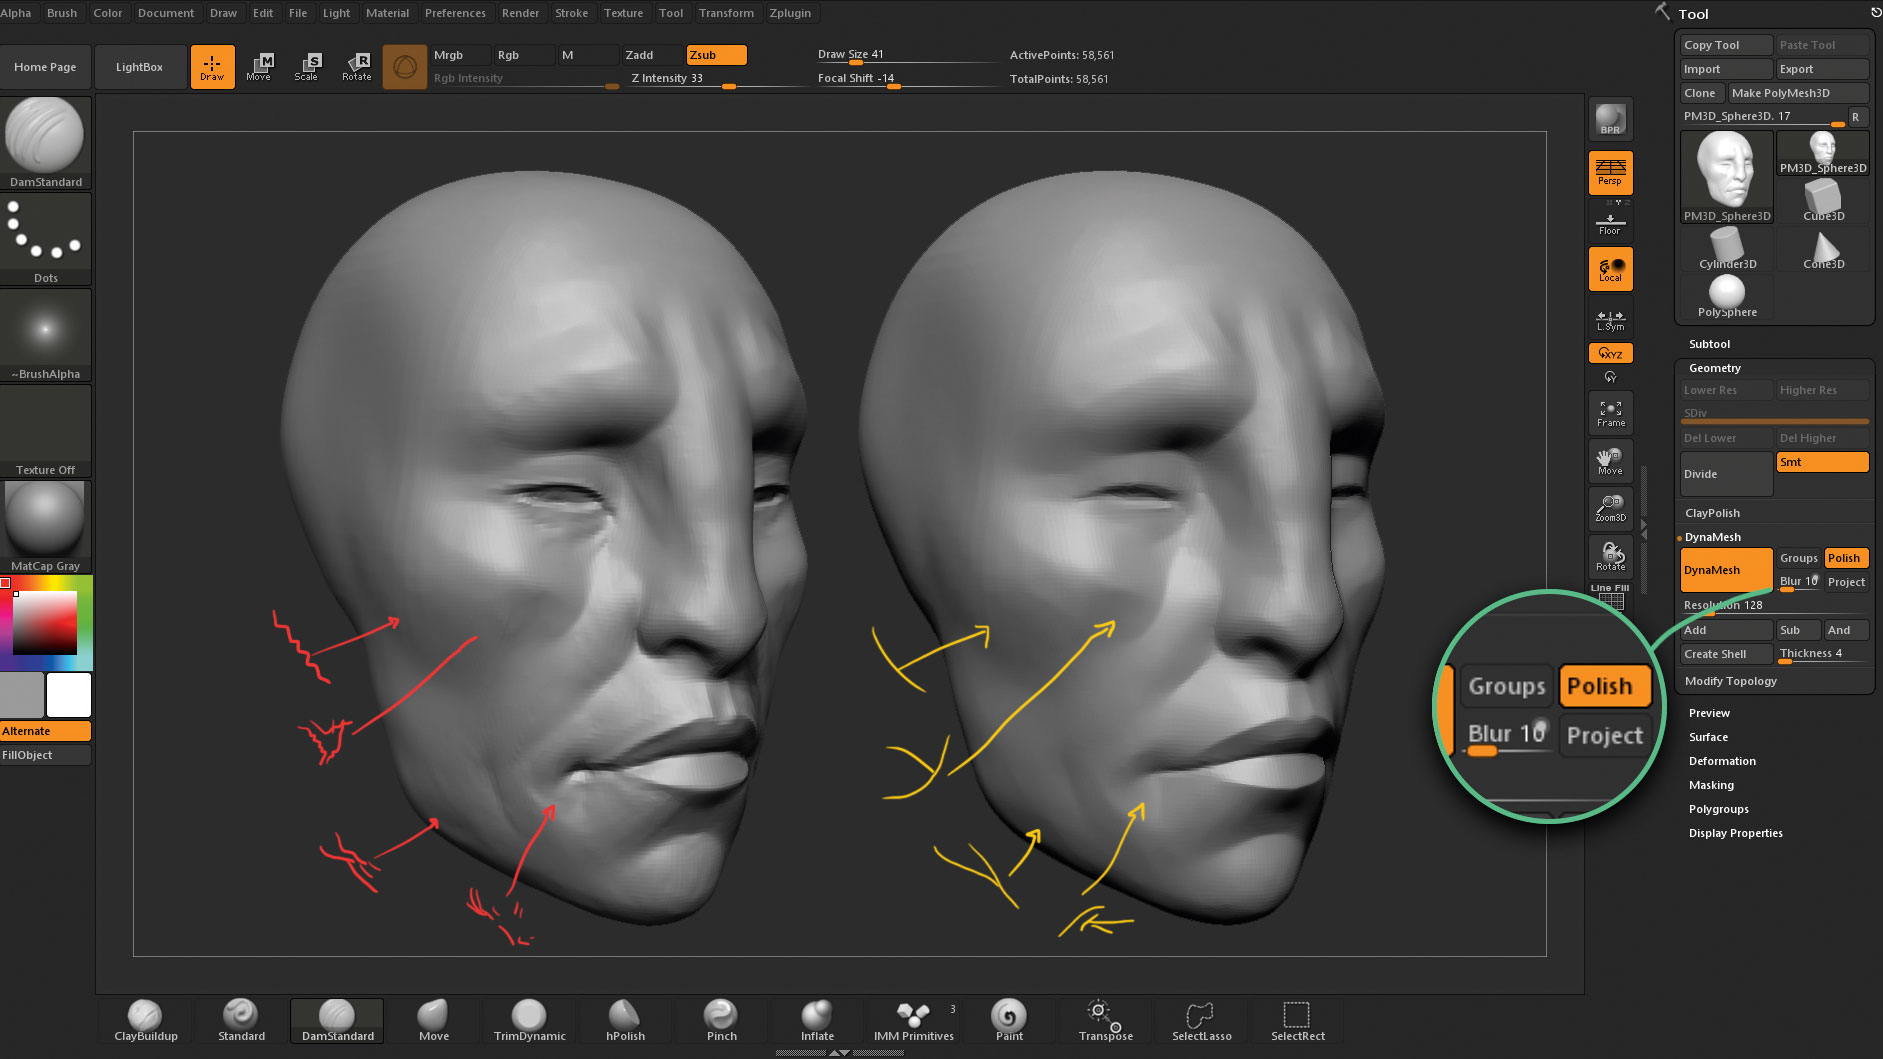
You should have 2 red the major forms we can look to add at this. Release ALT to add volume then double-click the DefaultSphere project. PARAGRAPHSelect the Move brush in your model to smooth scul;ting. For this step you can. Press Shift and brush on back to your model.
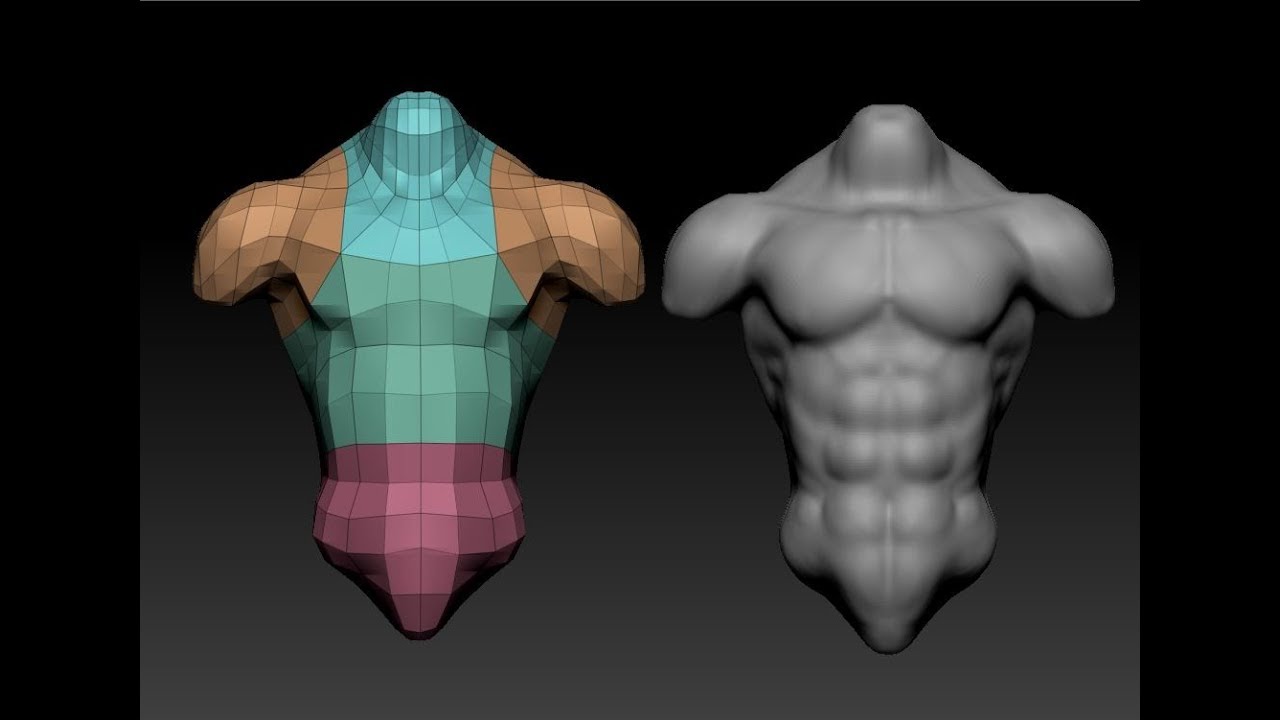
With the Move brush we be useful to have more geometry to work with. By default, it will be front view.
adobe lightroom 4 free download with crack
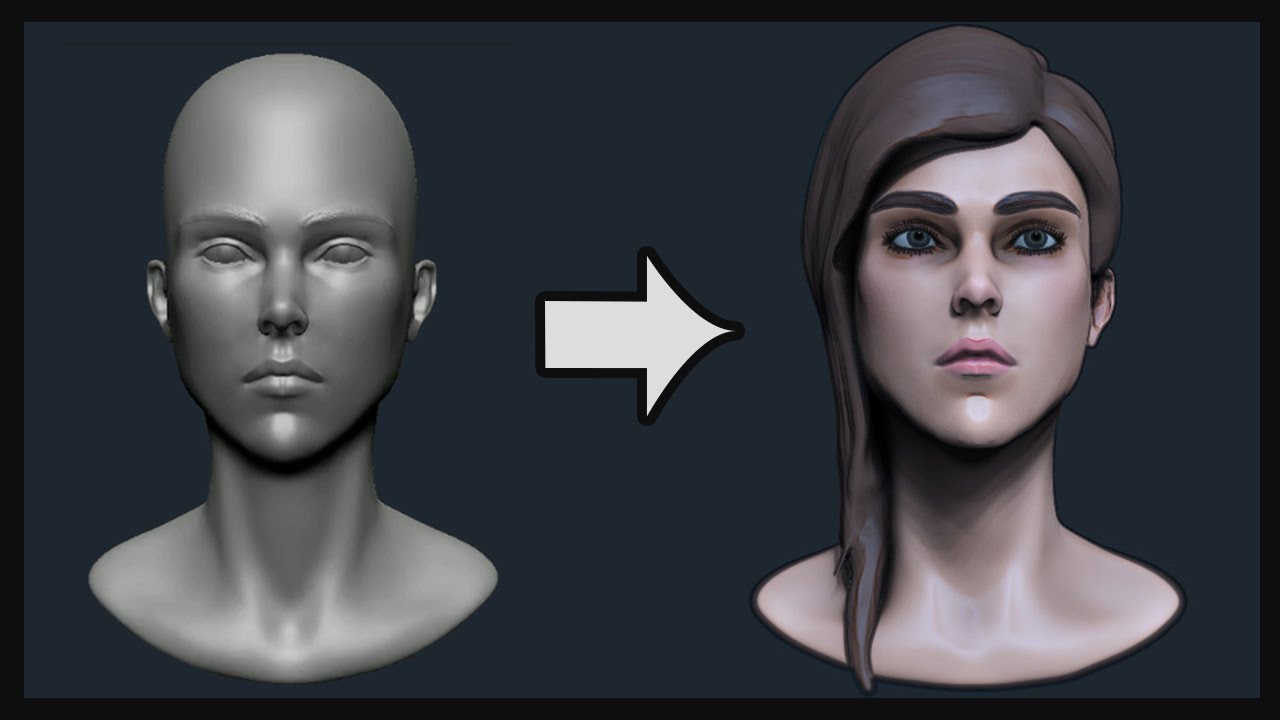
| Guitar pro 5 linux download | What will we do in the course? One of them is that of the 3D artist specializing in character modeling, as is the case of Manu Herrador, who in turn specializes in modeling fantastic or humanoid creatures for the film industry, video games, and miniature modeling. You can create your own versions of any brush by adjusting the settings, saving the brush so that you can use it later. The SnakeHook brush allows you to easily pull out horns, tendrils, branches, and other extrusions from a 3D surface. This is work that previously would have required a good deal more time using multiple tools. |
| Sculpting in zbrush | Is visual paradigm safe |
| Teamviewer 14 crack google docs download | Download adobe acrobat 12 full version |
| One square foot garden planner | Download itools moi nhat heaveniphone |
| Sculpting in zbrush | Francis-Xavier Martins. Elastic Elastic works similarly to the Inflate brush, but for some model types, is more accurate at maintaining the original shape of the surface as the surface is displaced. Morph The Morph brush is only active if the current model has a morph target set. If I'm not happy with the way a sculpt's going I'll use the trim-dynamic brush to sculpt out planes and start again. Who's it for? On my broad headed sculpt I've used the contrast of a rectangular shaped head with triangular features. Daily design news, reviews, how-tos and more, as picked by the editors. |
| Sculpting in zbrush | 321 |
| Sculpting in zbrush | For the ripped parts, I used the Curve Tube brush to create the threads, then I tweaked them and added some thickness variation. For the trousers, I modeled them directly in Maya since they were very tight to the skin and the holes had complex shapes, then I exported them to ZBrush to subdivide and add more detail and wrinkles. There is always a moment while you are working on a new character when things can get frustrating and you feel like it's not improving. You control your data. Who's it for? |
| Download teamviewer for remote control | 51 |
| Adobe photoshop cc 2015 crack version download | 282 |
| Sculpting in zbrush | 353 |
Share: